Hope you enjoy...

 I hope you enjoy these photo. I am trying to not just post projects. But a little about me too.. so this is me....
enjoy the photo and stop back by soon. I do have a few really fun projects to post soon..
TTFN
Terri Sproul
I hope you enjoy these photo. I am trying to not just post projects. But a little about me too.. so this is me....
 Front Cover of the Holiday Issue: Do you have your yet????
 could I be related to Merrel Streep? A friend of mine made this photo up as a joke and how everyone think I'm her. Too funny. Tell me what you think.... all in the fun of Halloween!
 I found these chipboard butterfly shapes at Michael - it was made to be a book. there were holes in the corners of the page to attach them together. But you know me I need to think out of the box and off the page. so I came up with this.
 I glue three coin envelopes together to make a pocket area. In each of the pocket I add a tag with ribbon. I wrap lace ribbon around the bottom of the pocket and tied into a bow..
 This Photo show the embossing powder around the edge well. I just added clear embossing ink to the edge. I used the direct to paper technique and sprinkle on my embossing powder (I used a dark color for my project here). Tap off the extra and heat set.
 Here is a top view on how the star is made. I used Glue Dots to glue each of the butterfly wing together on all the edges.. See why I had to score the butterfly now. It made it easier to adhere together.
 This is the cover: Here I used Pattern paper to cover the CD and then paint some metal number with Acyclic paint. Those are clock hands (doesn't work as a clock- just an embellishment)
 I used a Slide Mount and more painted metal letters. The brads have Crystal Lacquer on them to give them that gem look.
 Do you just love the little cat collar. It's so cute. It's an embellishment from EK Success. Also check out the large (very Large) paper clip.
 Found this cute little Cat Charm at a yard sell (sorry). But I did use a smaller paper clip and attach a charm to it.
 On these two pages I made pockets. One of the pockets (black one) is made from a tag. I just folded the tag up and made it into a pocket. Added some tags in the pockets.

 After my Memories Mists is dry I glue them together with My Glue Dots
 Now add embossing Powder of your choice and color to the Pop Up Glue Dot. Remove the extra embossing Powder and Heat set with your heat gun
 HINT: be careful Not to heat your silk flower too much. they melt.. So keep you gun far aways and just melt the powder.

 If all goes I as plan I will have a video for you on how to make this tag. I will post onto My Youtube Channel. Due to all the storms I am unable to post the video yet. plan on uploading it this weekend. I live on top of the middle of nowhere and I have dial up. we have been having days of rain, lighting, etc... So my video will take a few hours to post and i can't leave my computer on that long with the storms... So Sorry.....


Supplies:
Glue Dots® “Pop Up”
Glue Dots® “Craft”
Glue Dots® “Glue Lines”
Cigar Box
Gesso
Stamps: Stampotique Original: “Kitty”, “Welcome Door”, “Spider”, “Honeycombs”, “Crow on Line”
Stamps: Moon by Fancifulstamps
Stamps: Quote by PXS Stamps
Stamps: Stars from Martha Stewart
Colored Pencils: Faber-Castell
Ink Pads: India Ink by Stewart Superior, Memories Dye Ink “Yellow”, “Cement” and “Sepia” Memories Ink pad are also from Stewart Superior
Goldens Glaze: “Ultramarine Blue” and “Patina Green”
Acrylic Paints: Black
Silk: Sky Blue by Stewart Superior
Memories Mists: Iridescent by Stewart Superior
Textured Ribbon – brown mesh
White Cardstock
Directions:
1) Cut top of Cigar Box lid off… Keep for another project!

2) Paint the entire box with Gesso (this is a primer to cover all the cigar box labels). Paint outside of box with Black Acrylic Paint. Paint inside of box with two colors of Glaze “ Ultramarine Blue” and “Patina Green”

3) When paint is dry Stamp “Stars” with “Yellow” Dye Ink
4) On White Cardstock stamp the following in India Ink and color in with Faber-Castell Art Grip Pencils: “Spider”, “Kitty”, , and “Girl”. Also Stamp “Moon” onto White Cardstock and Paint with Stewart Superior “Sky Blue” Silk. Stamp the “Welcome Door” with “Sepia” Memories Dye Ink, before I color in the image I painted Gesso on the door where it’s says “Welcome” to completely cover this word… When you have colored in each image, cut them out.

5) Back to the box: Stamp using India ink “Crow on a line” (see sample for placement) also Stamp “honeycombs” onto the bottom where your door will be. I used the Honeycomb stamp to look like a walk ways…. Stamp in Memories Dye Inkpad “Cement”. Paint in honeycomb image with Acrylic Paint.


6) Using My Glue Dots® I start to put my box together. I used the “Pop-Up” under the Moon, and the Kitty. “Craft Dots” under the Door, Girl and the Spider. As for the Spider, I hung spider from the top of the box with “Craft Dots” My Girls is adhered to the side and bottom of the box. I used Fishing line to make the spider line invisible, I just Glue Dotted to the back of the spider and the top of the box.


 Finished by stamping “Trick or Treat” inside the box where it fit the best and spray the entire box with: Iridescent Memories Mists. Around the outside of the box I wrapped a Mesh ribbon using My “Glue Lines”.
I wrote this blog post while participating on the Glue Dots Design Team!
TTFN
Terri Sproul
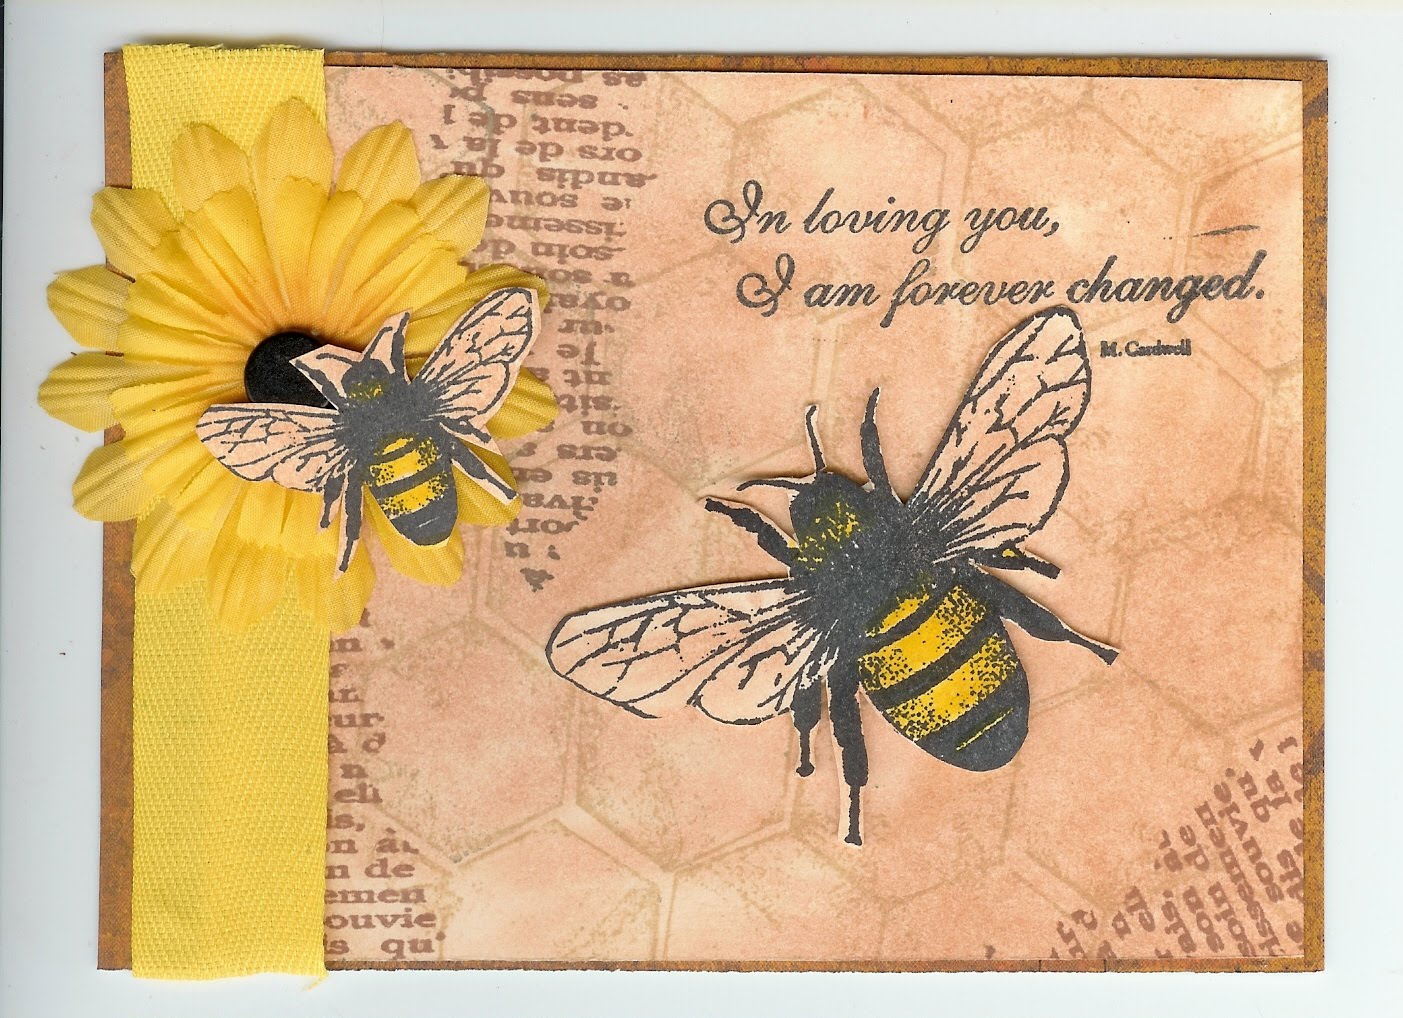
 Love the lace boarder.

Supplies:
Hero Arts Stamp: Wine
Yellow Pattern Card stock: Old kit from Club Scrap
Purple Card stock – Unknown
Flowers: Prime
India Ink stamp Pad from Stewart Superior
White Card stock
Memories Chalk Ink “Faded Lavender”
Directions:
1) Stamp Wine Bottle Image onto white card stock with India Ink (HINT: India ink works well, because it’s will not bleed when you use the Crystal Lacquer).
2) Color in Wine bottle Image using Crystal Lacquer as desired. Set aside to dry (HINT: when color one color next to another color, I let the first color dry first. Example: on the wine bottle itself, I would color the cork, wine and left first, let dry a few minutes (it took a while for those color to be colored in, so about 5 – 7 minutes depend on your area.) After those color where dry then I color in the label and the bottle.
3) Once Crystal Lacquer is completely dry I used Memories Chalk Ink “Faded Lavender” around the edges to soften them some. Matte Image onto Purple card stock.
4) Score and fold card. Add matted Stamp Image to bottom right hand corner. Add Flowers using my Glue Dots
I have not been work with my Crystal Lacquer Color Set as much as I enjoy too. So with this card, I pull them out again. Don't you just love the 3-D look of the Lacquer? I hope you enjoy spend a few minutes here with me on my blog. Come back soon more about me and my crafts.